Deburring Micro Parts: Electrochemical, Abrasive and Thermal Methods Compared
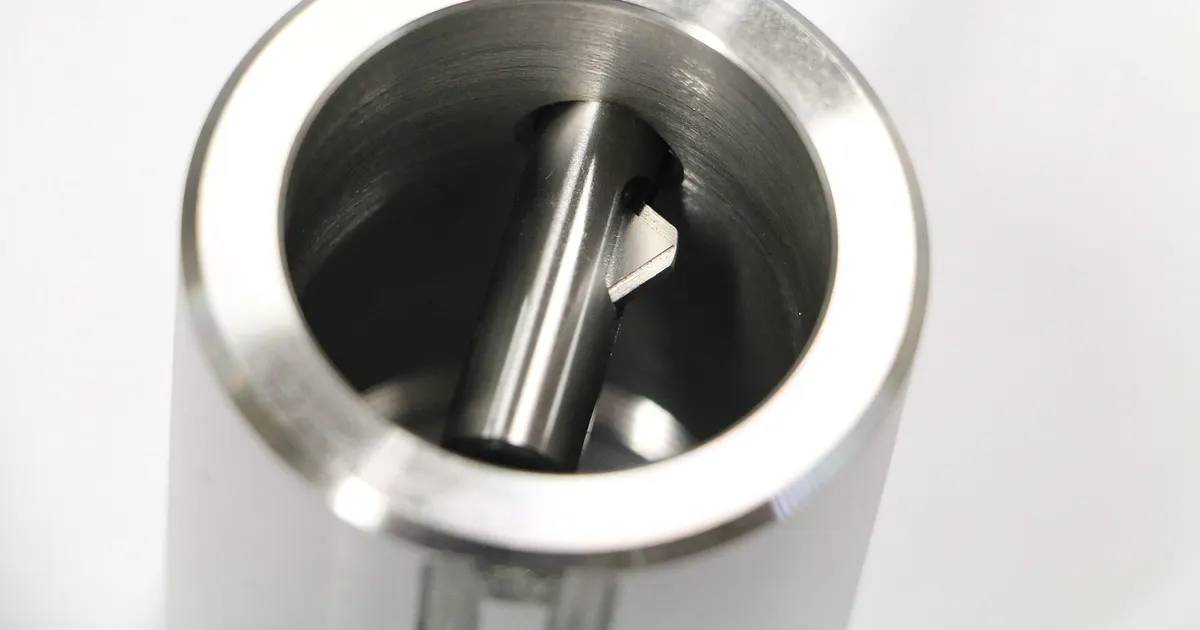
Burrs are the quiet cost of micro machining. A burr that a person cannot feel can still jam a valve seat, scratch a sealing face, release into a fluid line or interfere with a press fit. On parts under 10 mm, it is also the step most often left off the drawing, and then argued about at inspection. This guide compares the common deburring methods so the drawing can state what is needed. For how burr formation depends on the material, see the guide to materials for micro machining.
Where burrs come from
A cutting tool pushes material ahead of itself, and at the exit of a cut the material folds over instead of shearing off. Burrs form on the exit side of holes, at the end of milled slots, along the edges of turned shoulders and where one hole meets another. Soft, ductile metals such as pure copper, 316L stainless and Grade 2 titanium burr more than free-cutting brass or 303.
Good process choices reduce the burr before any deburring step: sharp tools, lower feed at exit, sacrificial back-up material and a cut sequence that finishes edges last. Deburring then removes what remains. Specifying both is cheaper than relying on one.
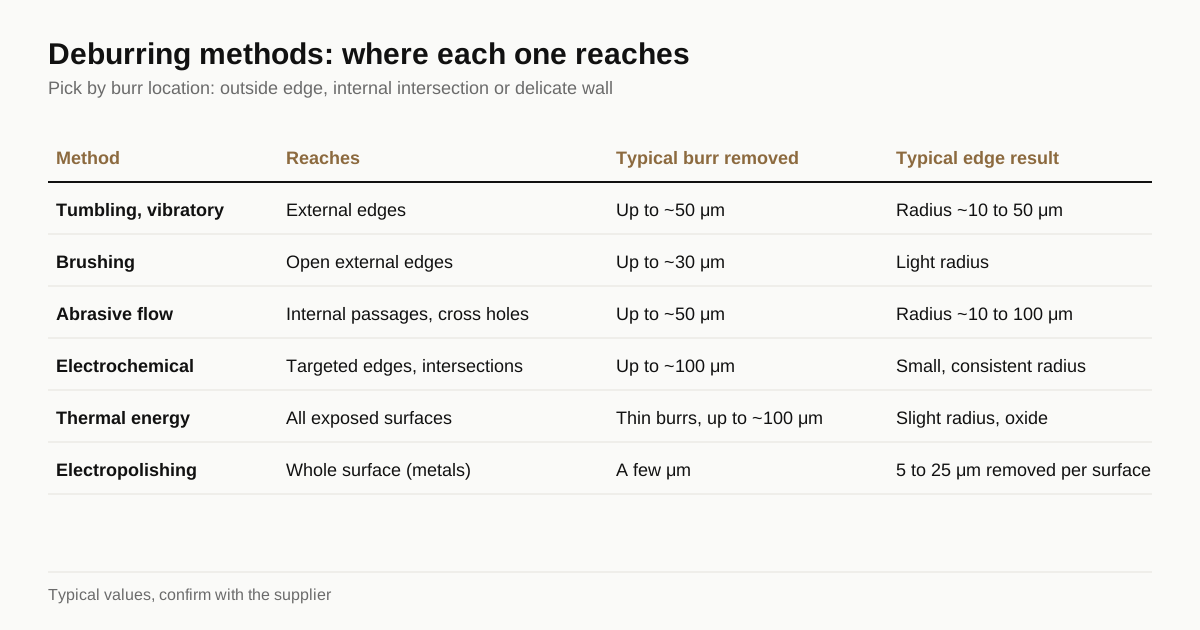
Methods compared
| Method | Reaches | Typical burr it removes | Edge result | Main limits |
|---|---|---|---|---|
| Manual, under microscope | Visible edges and hole mouths | Any, one at a time | Controlled, operator dependent | Slow, not for volume, risk of damage |
| Tumbling and vibratory with fine media | External edges | Up to about 50 μm | Edge radius about 10 to 50 μm | Can round sharp edges, media may lodge in holes |
| Abrasive flow | Internal passages and cross holes | Up to about 50 μm | Radius about 10 to 100 μm | Needs fixturing, slower, not for open geometries |
| Electrochemical deburring | Targeted edges and internal intersections | Up to about 100 μm | Small, consistent radius | Needs electrode and fixture per part |
| Thermal energy deburring | All exposed surfaces, including internal | Thin burrs, up to about 100 μm | Slight radius, oxide layer | Not for thin features or heat-sensitive parts |
| Electropolishing | Whole surface | Burrs of a few micrometers, smooths all | 5 to 25 μm removed per surface | Does not remove large burrs, metals only |
Typical values for orientation. Confirm with the shop that runs the method.
The methods in more detail
Tumbling, vibratory and brushing
These are the standard bulk methods. Parts and fine media tumble or vibrate in a bowl and abrasive removes burrs by rubbing. They are efficient for many small parts at once and cheap per part. At micro scale the media must be smaller than the smallest hole or slot, or it jams. Delicate parts can bend or dent against each other, so shops often use compartments or a gentle process.
Brushing, either by hand or with abrasive-loaded filament brushes, removes outside burrs from a part in a fixture. It is quick for flat edges and unusable inside small holes.
Abrasive flow
A viscous putty loaded with abrasive is pushed back and forth through the part. It wears down burrs along the path the putty takes, including inside cross holes and passages. It works well for fluidic manifolds and nozzle bodies. The part is held in a fixture that directs the flow, and the process rounds edges at the junctions, so the geometry must tolerate a small radius.
Electrochemical deburring
An electrode shaped to the burr location is placed near the burr in a conductive electrolyte, and current dissolves metal from the burr first, because the gap there is smallest. It leaves no mechanical stress, produces a consistent edge radius and works inside intersecting holes. The cost is the tooling: each part type needs its own electrode and fixture, so it pays back on repeat orders, not on one-offs.
Thermal energy deburring
Parts sit in a sealed chamber filled with a gas mixture. A spark ignites it and a brief burst of heat burns away thin burrs, which have little mass to carry heat away, while the body of the part stays comparatively cool. It reaches every exposed surface in one cycle, so it is common for high volumes of hydraulic and fluidic parts. It leaves a thin oxide layer that may need cleaning, and it is risky for very thin walls, tiny sharp features or heat-sensitive materials. Test it on samples first.
Electropolishing
Electropolishing dissolves a thin skin from metals in an electrolyte, rounding the peaks first. It levels burrs of a few micrometers, brightens the surface and improves cleanability, which is why medical and food parts use it. It removes 5 to 25 μm per surface, so tolerances need allowance, and it does not remove larger burrs. Treat it as a finishing step after another deburring method.
Typical burr limits by application
There is no universal limit. The right number depends on what the burr can do in service.
| Application | Typical burr limit | Why |
|---|---|---|
| General mechanical pin or housing | About 50 μm | Handling safety and assembly |
| Sliding or sealing surfaces | About 10 to 20 μm | A burr scratches the mating face |
| Fluidic channels and nozzles | About 10 to 20 μm | Flow disturbance and particle release |
| Electrical contacts | About 10 μm | Plating coverage and contact area |
| Implants and body-contact parts | None visible at 10x to 20x | Tissue contact and cleanability |
Typical values for orientation. The design engineer sets the real limit.
A tighter limit costs more, because it moves the part from a bulk method to a fixtured or electrochemical one. Setting a limit by function rather than by habit can remove a whole deburring step. When in doubt, test what burr size actually causes a failure before writing a number that no shop can verify.
Hypothetical example
A 316L manifold has four ⌀0.3 mm cross holes, wall thickness 1 mm, one end open. After drilling, a 20x microscope shows burrs of about 20 to 30 μm at each intersection. The drawing says only “deburr”.
The shop has three paths. Manual deburring by hand under a microscope works for prototypes at perhaps a few minutes per part. Abrasive flow handles 200 parts with a fixture, and rounds the intersections to a radius of 50 μm. Electrochemical deburring gives a smaller, repeatable radius but needs electrodes. A clear drawing line removes the guesswork: “remove burrs at cross-hole intersections, no burr visible at 20x, edge radius 0.02 to 0.08 mm, flow test after”. The shop then picks the cheapest method that meets it.
How to specify deburring
- Burr limit. A number or an inspection rule, not “break all edges”.
- Edge radius range. Minimum and maximum, and where a sharp edge is required.
- Locations. Name the cross holes, the sealing faces and the thin edges.
- Dimension allowance. State which dimensions are measured after deburring.
- Cleanliness. Particle limit, rinse and drying if the part carries fluid.
- Inspection method. Magnification and lighting.
The tolerance and materials reference lists typical edge and surface values. When the drawing carries these lines, send an RFQ. Micropartz matches it with up to 3 shops that run the right finishing process and replies within 24 business hours.
Frequently asked questions
How big is a typical burr on a micro part?
On machined stainless or titanium, burr height of 5 to 50 μm is typical, and ductile metals produce larger ones. On a ⌀0.3 mm cross hole a 20 μm burr reduces the opening noticeably. Exact size depends on tool wear, feed and material.
What is the best way to deburr a cross hole?
Internal burrs need a method that reaches inside: abrasive flow, electrochemical deburring with a shaped electrode or thermal energy deburring. Brushing and tumbling rarely reach a ⌀0.3 mm cross hole. The cleanest answer is a design where the cross hole is accessible.
Does deburring change the part dimensions?
Yes. Every method removes some metal or rounds the edge. Abrasive and electrochemical methods typically remove a few micrometers, electropolishing 5 to 25 μm per surface. Tight tolerances need allowance before the finishing step.
Can burrs be inspected without a microscope?
Not reliably. A burr of 20 μm is hard to see or feel. Shops use a stereo microscope at 10x to 30x and state the inspection method with the burr limit, for example 'no burr visible at 20x'.
Reviewed against
Numbers in this guide are typical values for orientation. The drawing, the material certificate and the matched shop set the real ones.
Get matched with a micro machining shop
Send your drawing once. We match it with up to 3 shops that fit the part, and reply within 24 business hours. Free for buyers.
Send an RFQ